Wednesday, June 20, 2012

Tina and Lucy: Moonstone

Here is part two of the Tina and Lucy polish reviews, and this morning I've got Moonstone to show you!  

First off, let me just say that Moonstone is by far the most frustrating polish to try to photograph; it's much prettier in person.  Moonstone is a seafoam-leaning-army-green, with glassy flakies throughout.  The effect is very subtle even in person, which is why it was very difficult to capture on my camera.  If you look closely in the pictures, you can see on some of my nails the flash of the flakies when the light hits it just right.  

Formula on this one was relatively sheer.  I had on two coats of OPI Barre My Soul (very sheer nude polish) before I did this, and decided to keep it on to minimize the number of coats I'd need of Moonstone to not have any visible nail line.  This is three thin coats of Moonstone, followed by two coats of Seche Vite.  I did need two coats of Seche Vite because some of the flakies didn't lie flat on my nail.  Application was very easy and the flakies were spread evenly.  


You can see the flakies better in the bottle:


I feel like this colour shouldn't look good with my skin tone, but I really like it so I don't care; I'll wear it anyways.  This polish is definitely very unique among the masses of glitter-bombs that you see from most indie sellers; I really like the subtle effect. 

You can buy Tina and Lucy polish at their Etsy shop, and like their Facebook page for updates.  Their store is temporarily closed, but it'll be open again soon! 


Disclaimer: The product in this post was sent to me for review and my honest opinion. 

Tuesday, June 19, 2012

Tina and Lucy: Peat

Today I've got a very unique polish to show you from indie polish-maker Tina and Lucy.  Peat is a dark forest-green with medium silver (leaning light green) hex glitters and silver micro-glitters.  It dries to a satin finish (which I forgot to photograph,) so I've shown it here with both matte and shiny top coats.  

The base in Peat is somewhere between a creme and a jelly.  It's enough of a creme that I only needed two coats for full coverage, but I did get some of the "buried glitter" effect that a jelly gives.  Formula was on the thick side but I had no problems with application; the glitters were spread evenly after brushing over the nail a few times.  The first few pictures are with one coat of Seche Vite followed by one coat of Essie Matte About You.  The glitters were only a little gritty after one coat of Seche Vite, and two coats (on my right hand) was plenty for a smooth, glossy finish.  Hooray for glitters that aren't top-coat-hungry!  The colour of the polish in the pictures is pretty accurate, but please excuse my oopma-loompa hands. 


The next few pictures are with one more coat of Seche Vite on top of the matte.  The polish appears significantly darker with a shiny finish.


In the bottle I thought that the glitters were settling really badly, but after a ton of rolling and shaking and sitting upside-down and nothing appearing to happen, I looked inside and it was perfectly mixed.  I came to the conclusion that quite a bit of glitter was just permanently stuck to the inside of the bottle.  However, I am perfectly happy with how much glitter I got on my nails.  One more matte picture with the bottle:

Excuse the cuticles; forgot to moisturize before taking pictures :(

I really like this colour, it is definitely unique in my collection.  You can buy Tina and Lucy polish on their Etsy shop, and like their Facebook page for updates.  The Etsy shop is not currently open, but should be soon.  I have two more of their polishes to show you over the next few days, and they're both very different!

What do you think of Peat?  Do you like it better matte or shiny? Let me know, leave a comment :)


Disclaimer: The product in this post was sent to me for review and my honest opinion. 

Saturday, June 16, 2012

Deborah Lippmann Ray Of Light

Here it is, finally; my very first Deborah Lippmann polish!   I bought it last Sunday and now I'm asking myself how on earth I waited so long to wear it.  

So what if I spent $18 on a bottle of nail polish?  I REGRET NOTHING.  Ray Of Light is the most beautiful navy blue that's somewhere between a creme and a jelly, and it's packed with coppery colour-shifting flakies.  Holy crap, I think I may have died and gone to nail polish heaven.  

First coat was very streaky and difficult and I was a tad bit worried, but the second coat went on absolutely perfectly.  Two coats of Seche Vite later, and I'm left with this beautiful thing on my nails.  I can't stop staring.  Seriously.  
Cue picture spam: 


I was extremely impressed by how flat the flakies were on the nail.  I've found that previous flakies I tried had a tendency to eat my top coat, but not this one.  Pure perfection.  Omnomnomnomnom.  Yea, I'm going a little crazy.

Anywho, I've got a few posts planned for the next couple of days, but I also have my provincial exam on Thursday, so posts may be sporadic and/or short.

Are you drooling over this polish as much as I am?  Do you have a favourite Lippmann polish?  Leave a comment, they make me happy :)

Thursday, June 14, 2012

Reverse Glitter Gradient

First off, let me say that I am NEVER doing a reverse glitter gradient again.  There was glitter all around my nails and stuck under my cuticles, and I swear I must have spent at least an hour cleaning up and picking off every little piece of glitter. *rant over*

For this I used Orly Royal Navy as my base colour, which is one of the ones I picked up on my Sunday trip to Sally's in Seattle.  Let me just say: Prettiest. Blue. Ever.  Royal Navy is a very saturated royal blue with some superfine turquoise-ish shimmer in the bottle.  When you get it on the nail, the shimmer isn't as obvious but it looks like it's glowing.  I'm sure there's at least some neon pigment in there, because it dried semi-matte.  Formula on this one was pretty goopy, but while at Sally's I also picked up my first bottle of polish thinner (yay!) so I'll definitely thin it out before I use it again.  

This is 2 coats of Royal Navy, and the glitter is Savina Sparkles.  I've only ever seen this brand at Nordstrom Rack and never bought any of them, but I saw this multi-coloured glitter and I didn't own anything like it yet, so in the cart it went.  Two thin coats Seche Vite, very carefully applied so as to avoid the shrinkage I usually get when using SV on Orly polishes. 


I still haven't tried my new Deborah Lippmann (how have I been able to wait so long?!?) but that will definitely be my next post.  I haven't told you what colour it is yet, so it'll be a surprise. :)

Wednesday, June 13, 2012

Mickey Mouse Nail Art

Good morning!  Today I'm showing you some nail art that I did last night after my swatches of F4 Polish Chunky Cow.  I found a nail art contest on Instagram and the theme was Disney, so I quickly did this.  The contest is hosted by @stephanie1011, hashtag is #stephdisneycontest, and I believe it ends on Saturday, if any of you are interested.  

I left Chunky Cow on three of my nails, and re-painted my ring finger with Sally Hansen Xtreme Wear White On.  I used my dotting tools (read: pins stuck into the eraser end of a pencil) and Sally Hansen Xtreme Wear Cherry Red and Black Out to make the Mickey Mouse design on my ring finger.  


On my thumb I have two coats of China Glaze Love Marilyn (any fellow Smash fans out there?) over one coat of Sally Hansen Xtreme Wear Cherry Red.  I freehanded the Disney "D" with black acrylic paint and a super tiny paintbrush.  Two coats of Seche Vite. 


I'm sure I've seen the design on my ring finger done before, but I can't remember where it was.  If any of you recognize it, please let me know and I'll link back to whoever originally did it.
Make it a great day! :)

Tuesday, June 12, 2012

F4 Polish: Chunky Cow

 Today I've got the last of my F4 Polishes: Chunky Cow.  This was the my first pick when I was looking at their Etsy shop, and I don't know how I waited to try this one last!

Chunky Cow is a mix of black matte micro-glitter and medium white matte hex glitter in a clear base.  I'm most definitely on the black and white glitter bandwagon right now, no doubt.  Application was a bit tricky; the white glitters didn't want to go where I wanted them.  I ended up having to pick up and re-place quite a few of them, but I think the end result is worth it.  Shown here is one coat of Chunky Cow over one coat of Sally Hansen Xtreme Wear Cherry Red (hooray for one-coaters!)  Topped with two coats of Seche Vite.  Who doesn't love a black and white glitter?


You can but F4 Polish on their Etsy shop, where they sell for $8USD per full-sized bottle, and check out their Facebook page for updates!

I've got a couple other posts saved up, mainly some nail art which includes Chunky Cow.  As I mentioned in my previous post, I picked up a few bottles of polish while in Seattle on Sunday, and I've now had a chance to try them all except my Lippmann!  It's probably pretty hilarious to others how excited I am about the fact that I own a bottle of Deborah Lippmann... hmm.  I'm also expecting some nail mail pretty soon, so lots of exciting stuff coming up!  Good night!

Monday, June 11, 2012

F4 Polish: Pink Salmon

I have yet another F4 Polish to show you today: Pink Salmon!

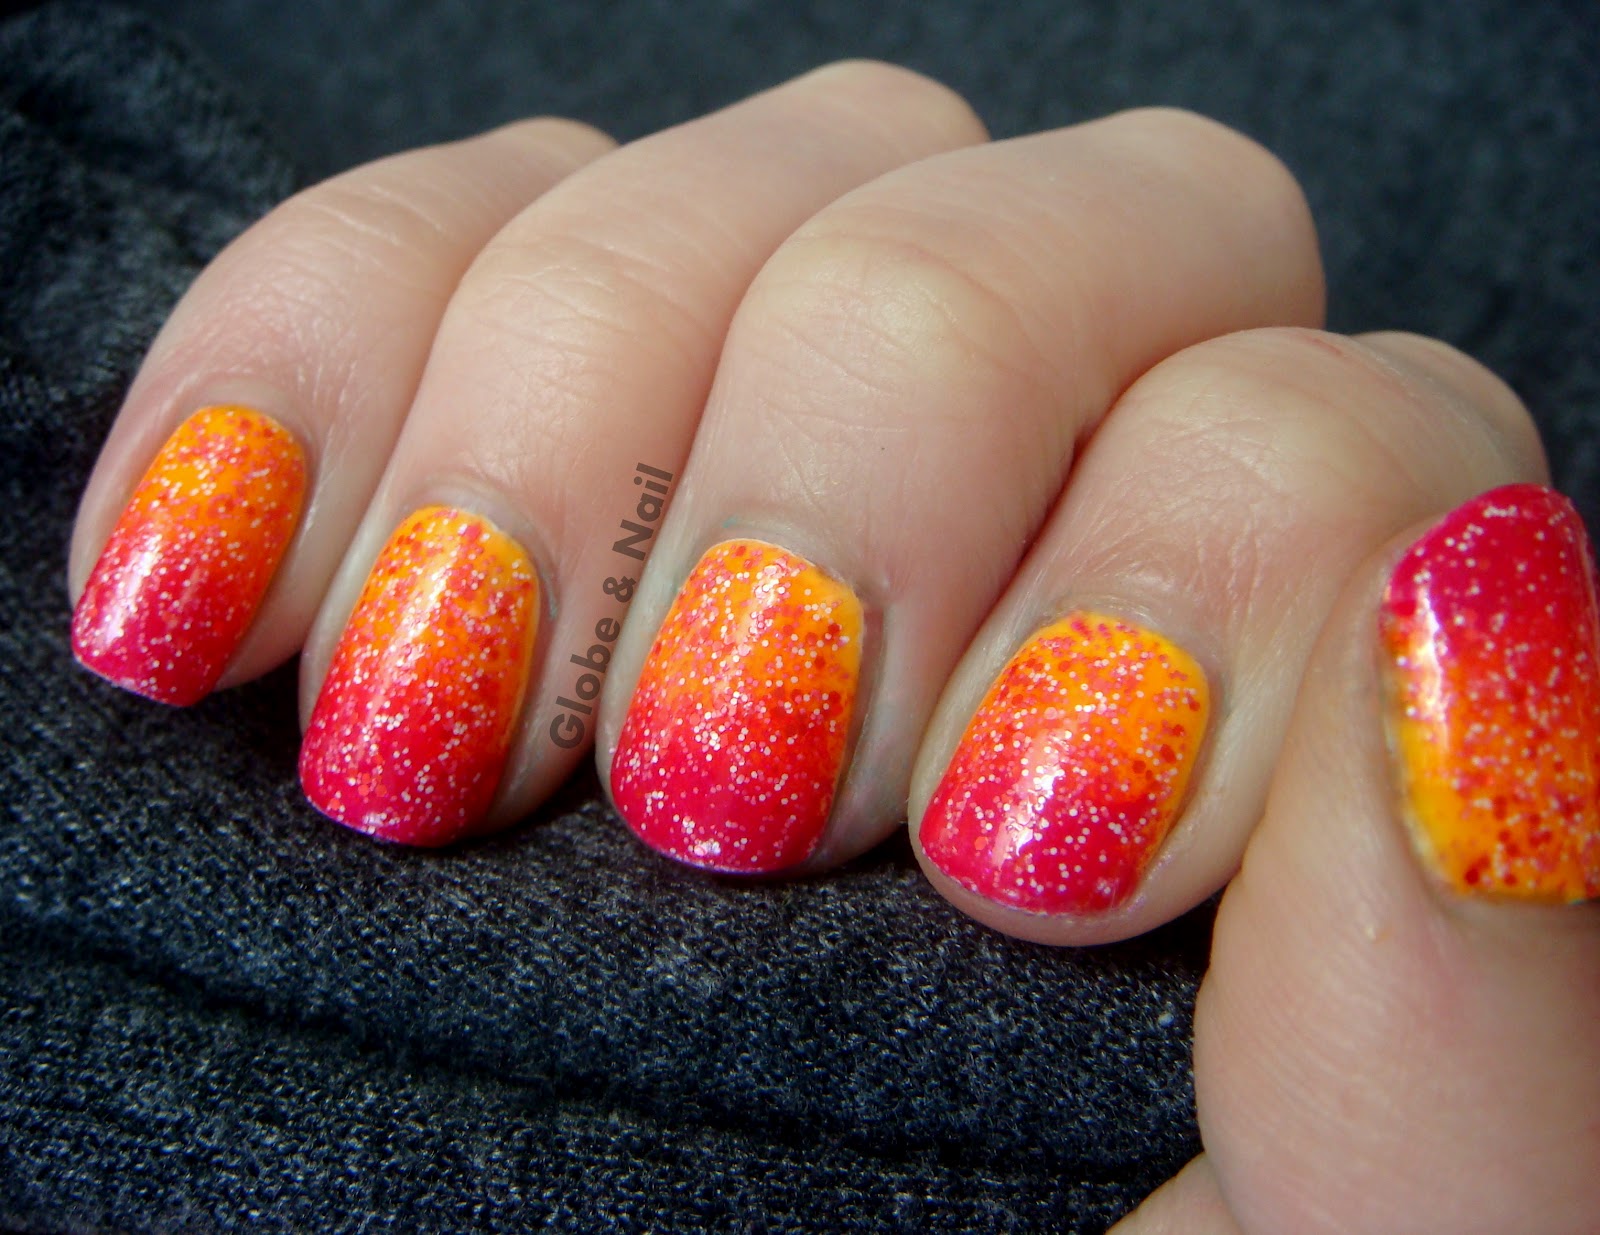
Firstly, no these nails are not my own; they belong to my sister.  You see, yesterday my mom and I decided on a whim to drive to Seattle to see Pacific Northwest Ballet's Season Encore (which was phenomenal) and the occasion called for a dress that just so happened to perfectly match my Mint Chocolate Chip nails, so of course I had to leave it on.  Therefore, my sister agreed to let me use her nails to show you this beautiful polish.  I couldn't decide whether to put it over pink or orange, so I did a gradient to use both, and love the result! 

Pink Salmon is a mix of white and pink matte micro-glitter with very small pink hex glitter.  For this gradient I started with one coat of Sally Hansen Xtreme Wear White On, followed by one thick coat of Essie Action, and then sponged Essie Super Bossa Nova on the tips.  Put on one easy coat of Pink Salmon and one coat of Seche Vite, and you're done!  Formula on this one was absolutely perfect, the glitter behaved very well, spread itself nicely, and wasn't gritty at all. 


The following picture is the result of my sister's statement: "Maybe if I put my hand like this, it'll look like an elevator!" Hmm... no.  But she'll be upset with me if I don't post it, so here it is.
(Aine: You know I love you.)
.


I forgot to take a picture with her holding the bottle (she ran off to her friend's house right after) so I took one with my still-green nails.  After this I only have one more F4 Polish to show you, but on my trip to Seattle yesterday I picked up 5 new bottles, including my first Deborah Lippmann! Needless to say, I was very outwardly excited... I just might have been on the receiving end of numerous sidelong glances.

Just a quick note: as I'm coming up on the end of the school year I'm very busy with finishing up my courses and studying for provincial exams, so I'm sorry if posting is a bit sporadic over the next 2 weeks.  I'll try to get the last F4 review up in the next couple of days, but beyond that I can't guarantee much until I'm done my exams.
What do you think of the new look? Let me know! Oh, and this was my 20th post; yay! :)


You can buy F4 Polish at their Etsy shop, and like their Facebook page for updates!  Their polishes sell for $8USD per full-sized bottle, and are well-worth it!


Disclaimer: products in this post were sent to me for review and my honest opinion. 

LinkWithin

Related Posts Plugin for WordPress, Blogger...